Variety of things to update you guys on today.
First off, I decided on the metal and thickness of the outer case frame. It will be a 0.063″ (1.6002 mm) 5052 Aluminum Sheet that is 6 different sections. The first section is 13″ x 48″ and it makes up the corner frame of the printer. In the center with a glass window 820 mm tall and about 3.5″ wide reveals an acrylic 36″ water cooling tube. This frame is repeated for both front corners. The rear corner frame is solid metal with cutouts for power inputs and USB. I finally chose this metal due to availability, cost, weight and stiffness. To save time, it is possible to just purchase plates that cover each respective corner. However, this is not a good seal for the chamber both thermally and for sound insulation. Therefore, I am also building a cheap home metal sheet brake to create the 60 degree angle necessary which should offer both increased insulation and aesthetic form.
The area is sealed off with 3/4″ PUR insulation with RGB LEDs to correspond to the build chamber RGB colors denoting current printer state.
RED : Heating up
Green: Print Completed
White: Printing
Blue: Cooling down
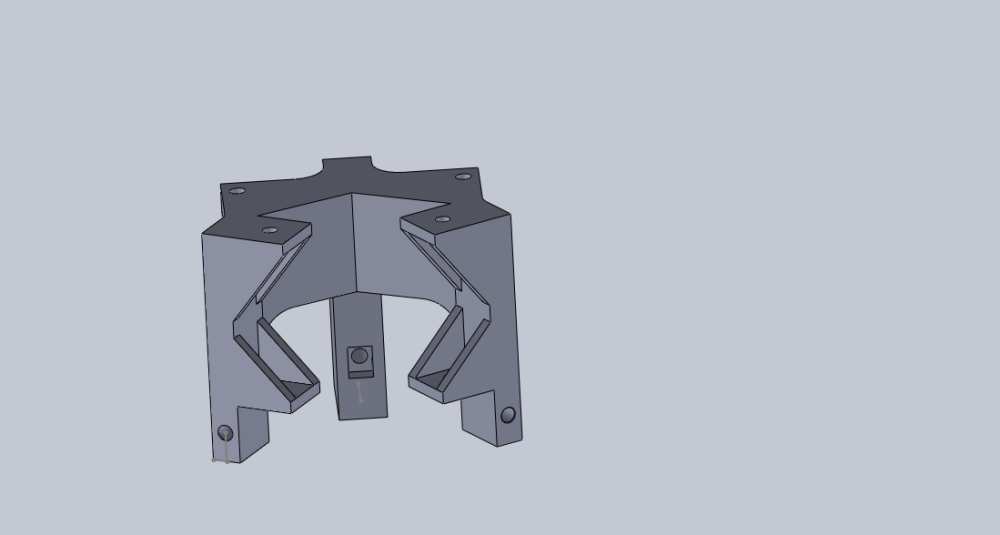
Here is the M8K-X bottom frame extension 2 V9:
Overall design has not changed much. there are now 3 differences. This is currently designed for the M8K-X Side Frame Extension Alu. V15 which utilized aluminum extrusions to connect the frame together. The connecting point is now a M5 25 mm screw that bolts directly into the extrusion. That is the first difference. The second difference is the vertical mounting points. The top mounting point seen in the picture was created to handle the load of the Aluminum Kossel frame and increase stability and the bottom mounting point is an optional connected for another set of 2020 Aluminum extrusions for better structural stability. The third, is a 20 mm increase in height. To mount to this, 24 pieces of the 120 mm length 2020 Aluminum extrusion, which is actually quite cheap. The Polymer version is available for those who are extremely adverse to any cutting of metal, although it is very expensive both in time and money to print all the pieces out in a strong enough material.

Here is the single optical bay drive reservoir I will be using in my 3D printer:
I am using a single optical bay drive reservoir that is mounting in the top section of my printer with direct access when the front door is opened. It is mounted in this manner so that water temperature can be measured. It is an easy indicator in the case that the pump dies and the water temperature steadily rises. It will also come with LEDs as well.
As seen in the very top image, there will be a huge glass door mounted in the very front. It is used due to being prebuilt and comes with its own hinges. It is the Morliden glass door from IKEA. This is a very nice glass door, and because the door also has an open slot for a secondary panel. a proper translucent panel can be placed behind the glass to protect the user from lasers.
The belt carriages have also been slightly redesigned. Instead of using 3D printed carriages with a screw tension. The mounting plate has been replaced with the Openbuilds mini v-slot gantry plate with the eccentric spacers which will be more accurate and lower the amount of effector tilt that may be present. It increased the cost of the printer by 35 USD, but that is a very small price to pay in the grand scheme of things.
That is all for now. Until next time!
