This will be a very long and detailed update with many design parts, their purpose and reasoning behind the designs.
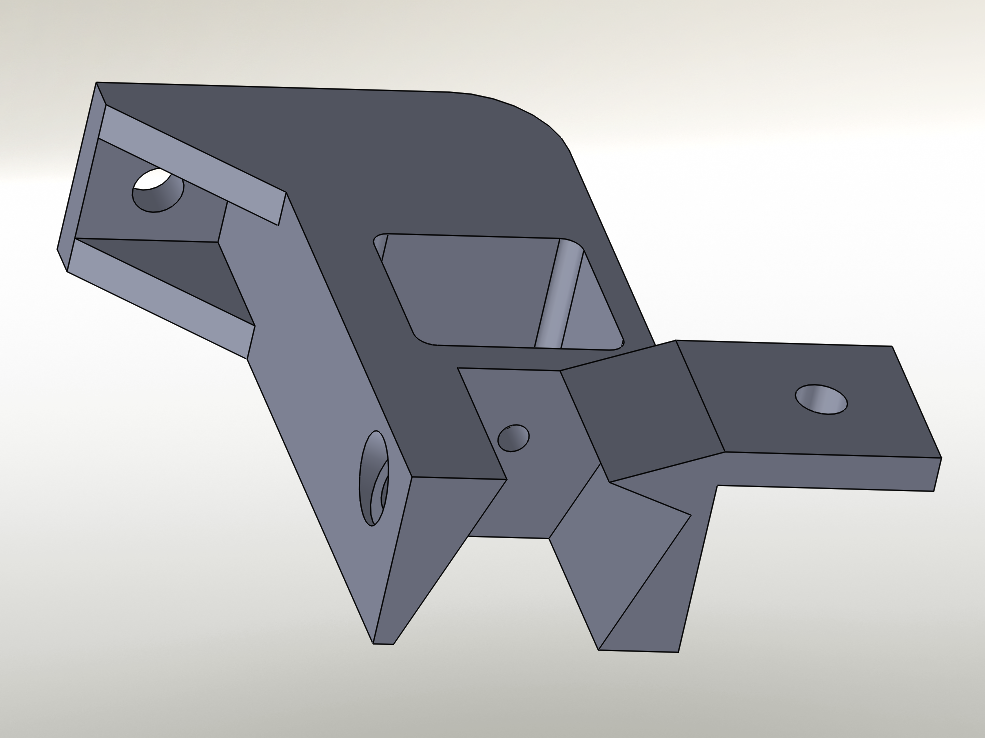
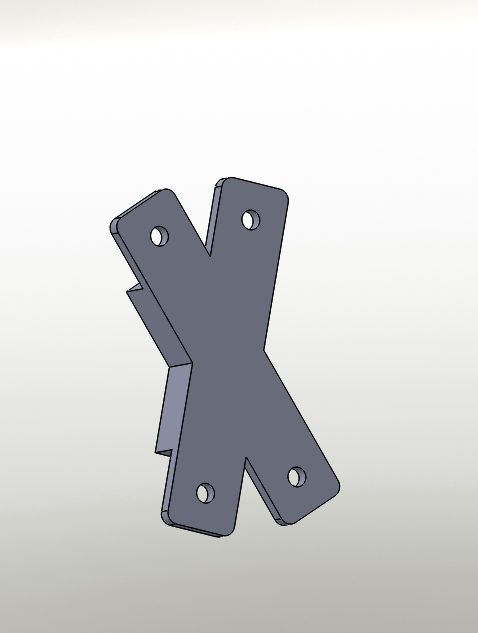
M8KX Top Brace:
The top brace here is the mounting solution to increase the overall frame rigid of the Kossel 2020 Alu design. At one end, there is an open slot for a 2020 aluminum extrusion with dual mounting points. On the side there is a M5 10mm screw slot to stop rotation along the X-axis. The 2nd mounting point is a M3 10mm screw with an opening in the center of the mount to both allow for wiring and for ease of screw installation which provides resistance against rotation along the Y Axis. With mount overall providing resistance against rotation along the Z- axis. The large mounting point in the rear is a M5 10mm screw slot with triangular reinforcements for strength. This mounting point mounts perpendicularly to the top Kossel 2020 extrusion. On the far right, there is a M3 10mm screw mount that attaches to the 150mm 2020 extrusion for stability. The overall length of the extension frame brace is 70mm which allows for full printing volume of the Kraken as well allow for Filament mounting storage on the other side of the aluminum extrusion.
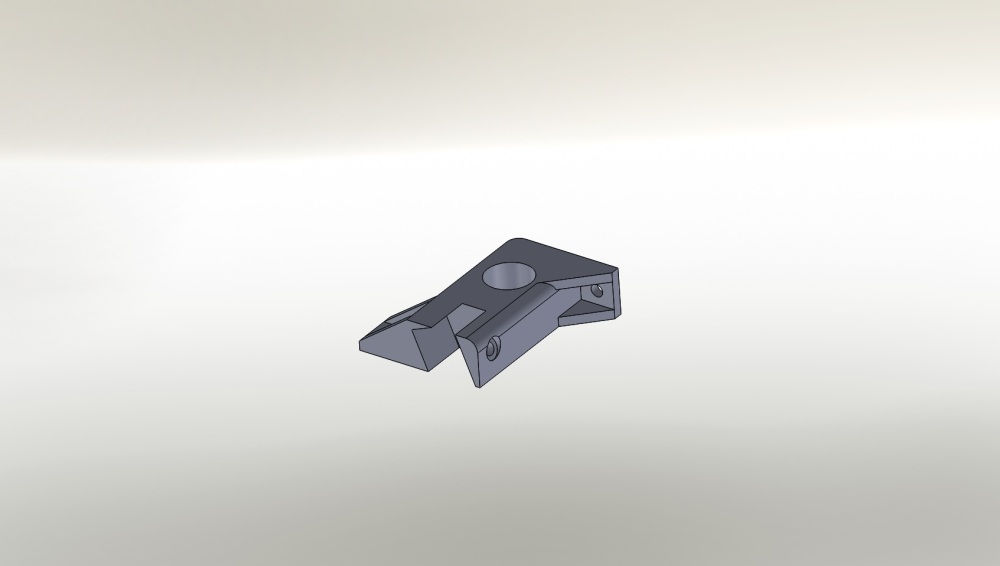
M8KX Bottom Frame Brace:
Nearly identical to the top frame brace with a slight modification on mounting positions .
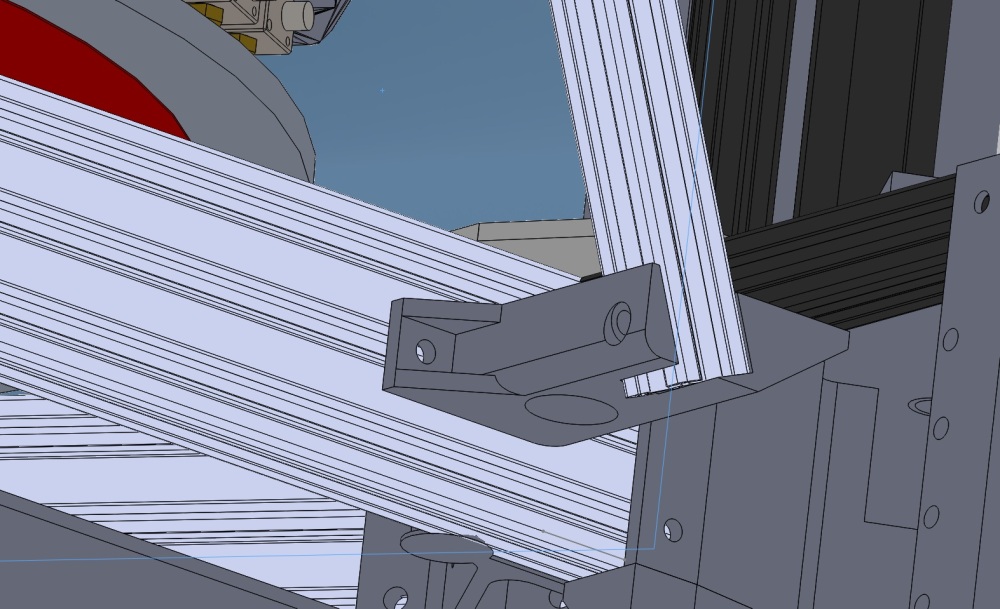
Here is the bottom brace extension mounted to the 20×60 Kossel extrusion connected to a 500mm 2020 aluminum extrusion.
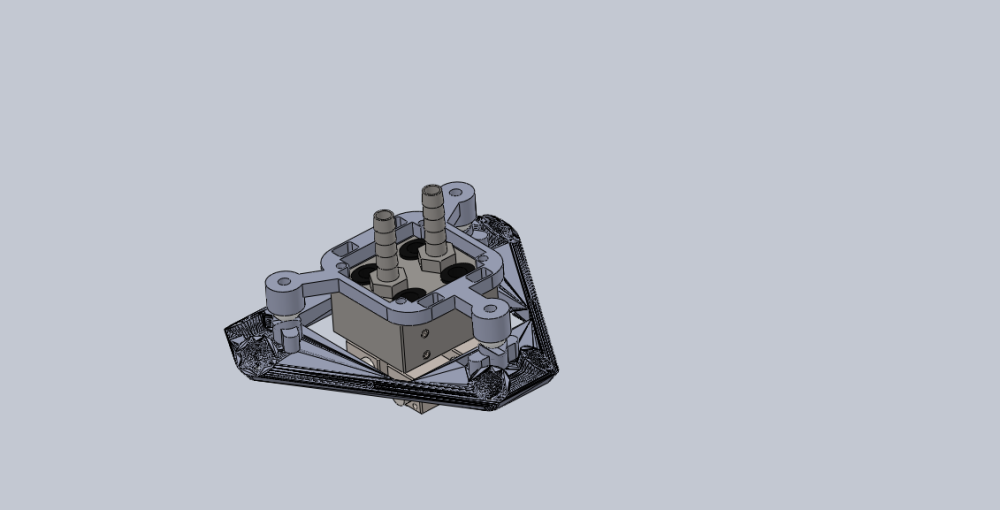
Kraken Mounts:
The Kraken mounts have been completely overhauled and switched over to solidworks .sldprt files for better compatibility. 4 wiring holes have been added to assist in cable management. This is an pre-alpha. There are a few upcoming design considerations to add fins to ease in auto-tool changing.
The Kinematic mounting points that attach to the effector have also been redesigned. Instead of utilizing a M3 nut that is mounting on top and has the possibility of being ejected or interacting with the steel ball and its magnetic attachment probability of the V-groove; They instead have been completely replaced by M3 brass inserts that are melted into place via a soldering iron.
The Kraken effector itself has had minor modifications. To improve the theoretical TES (Tilt Effector Stability) value (as introduced by PRZ), I decreased the ball spacing from 28 to 22, which significantly boosted the overall stability. This is important as having 4 offset extruders makes it significantly more sensitive to tilting effector problems should they arise.
M8K X Crossbrace Center mount
The original crossbrace center mount has been completely overhauled due to changes in width of the crossbrace and I reduced the redundant M4 screws used by 50%. This saves cost, weight and time. The center was significantly beefed up as it requires very high torsional stiffness.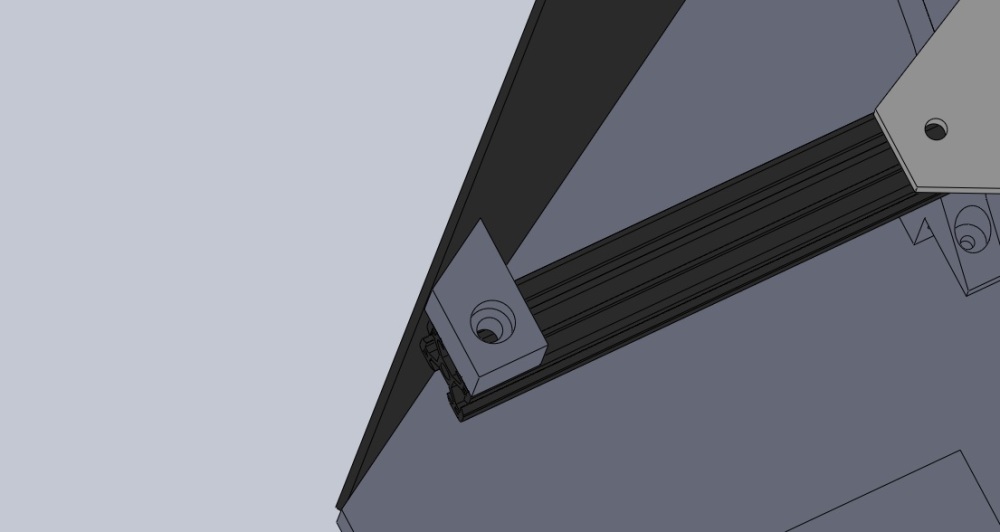
M8KX Corner Mount Mk.2
This is the most significant change in the design. Prior to the mk.2 design, the corner mounting parts which very large and costly in material. I’ve removed the bottom extrusion as a necessity, but have offered it as an option. In doing so, the original design is no longer valid as it was not structurally sound as it once was. Then I had a eureka moment in trying to significantly decrease the time and and amount of plastic required to print this modification to the Kossel 2020. This design simply connects the metal sheet to the aluminum extrusion by way of a m5 brass insert with a extremely low profile M5 10mm screw. By using this low profile screw and additionally the reduction of aluminum extrusions required from 24 -> 12, all of the aluminum sheets have been replaced with thicker sheets. I have moved from 0.063″ to 0.080″ (2.032mm) which will be tougher, stiffer and have the necessary allowance in thickness so that the M5 10mm low profile screws can mount through it. This drastic change dropped the printing time from 5-6 hours for 1 piece to under 30 minutes for one. Talk about optimization!
Bed mounts (not pictured)
The bed mounts themselves have been slightly redesigned. Previously, the bed mounts used M4 screws that mounted from the top of the plate to the corner mounts. However, I overlooked a bit pitfall of this method. The top of the M4 Screw would severely interfere with the hotend travel causing severe collisions. So I inverted 50% of the mounting on the bed brackets. Now the bed is bolted on from below, using 25mm M5 screws which utilize 2 6mm spacers often found on V-wheel gantries. This will do 4 significant things, 2 positive things, 2 negative things. However, I think the 2 positive outcomes outweighs the disadvantages.
Mounting from below advantages and disadvantages:
Pro: It does not interfere with Kraken movement
Con: It makes removing the bed far more tedious and time consuming
Pro: It now allow for mounting of other attachments for other bed surfaces such as parchment paper increasing versatility
Con: But mounting it on the underside and using 25mm screw, the enter bed assembly is raised above the surface, and I lose 15mm of total build height.
Water cooling Section:
I will add pictures and a deeper explanation of the parts in an following post due to the length of this one. But to give a quick overview:
4 watercooling blocks have arrived, 3 to cool the stepper drivers, and 1 to cool the DC-DC SSR
the acrylic reservoir has arrived and even came with brass inserts and two 12V blue leds. The digital thermometer built in the reservoir also is 12V which makes my life simpler. Nearly all the fittings are Barrows hand compression fittings with the exception of some pneumatic 1/4″ fittings that I picked up from Harbor Freight so that the 1/4″ tubing supplied with the Kraken could be attached to the Barrow quick disconnect.
Furthermore, I also received Primochill’s Rigid Revolver Hard tubing fittings in a shiny blue so that should really pop once the printer is all powered up and running.
Till next time~
